A card can have the correct artwork and still fail at finishing because the sheet shifts, the die cuts square corners, or the laminate cracks at the edge. By the end, you will know how to prepare and punch PVC sheets, test dimensional consistency, compare cutter types, and specify the machine details that affect daily output.
Key takeaways
- Specify 85.60 × 53.98 mm, 0.76 mm thickness, and 3.18 mm corners.
- Secure the printed sheet before punching to prevent shifted artwork and uneven borders.
- Compare manual, lever, and powered cutters against volume and operator effort.
- Test samples for dimensions, corners, edges, and defects across the sheet.
Define the Finished Card Before You Judge the Cutter
A cutter is suitable only if it produces the finished card you need: 85.60 × 53.98 mm, nominally 0.76 mm thick, with a 3.18 mm corner radius for a conventional CR80 dimensions and ISO/IEC 7810 ID-1 card.
Do not treat 86 × 54 mm as proof of that result. The figure might describe the finished card, cutting die, or artwork area. Ask for a technical drawing that labels every measurement.
| Measurement | What it may describe | What to confirm |
|---|---|---|
| 86 × 54 mm | Finished card, die opening, or artwork area | Which surface and tolerance the number represents |
| 2 mm thickness capacity | One card, a sheet stack, or a specific construction | The tested material and total stack thickness |
| Sheet size and yield | Accepted length, width, and cards per sheet | The layout and registration limits |
Treat 2 mm thickness capacity as a maximum until the supplier identifies its meaning. Confirm whether the cutter accepts single cards, pre-printed multi-up sheets, laminated sheets, composite cards, or only blank PVC.
PVC, PETG, polycarbonate, adhesive laminates, and holographic overlays need different cutting forces and die clearances. Specify the complete construction: PVC formulation, print coating, overlay, laminate, adhesive, and final thickness.
Require a rounded-corner die with a stated radius. A rectangular cut at CR80 length and width still leaves square, nonconforming corners. Also confirm the accepted sheet dimensions and number of cards per sheet before comparing machines.
Position, Punch, and Remove a Printed Sheet Without Shifting It
Use a registration template before production: show the die window, bleed, crop marks, safe margins, card number, photo, logo, signature panel, and barcode. Extend background colour or imagery 2–3 mm beyond the finished edge unless the cutter supplier specifies another bleed.
Keep text, faces, signatures, chip graphics, and fine borders inside safe margins calculated from measured PVC sheet alignment error.
- Let hot-laminated sheets cool completely and flatten before cutting. Record the interval between lamination and cutting; heat-related curl can shift registration and deform the edge.
- Follow the machine instructions for orientation: place the sheet print-side up or down as specified. Push one edge firmly against the locating stop, then align the first die window with the guide marks. Do not estimate its position by eye.
- Feed one sheet at a time unless the supplier has tested the stated stack. Hold the sheet flat, keep fingertips outside the punch path, and complete the handle stroke in one controlled movement.
- Wait until the punch returns fully before removing the finished card. Use a tool to clear the waste frame and internal chads, never your fingers.
| Stop condition | Likely issue | Action |
|---|---|---|
| Handle bottoms early | Excess thickness or obstruction | Stop and inspect |
| Card remains attached | Incomplete or dull cut | Stop; do not tear it free |
| Skew or edge whitening, burrs, cracking, laminate lift | Misalignment, pressure, or die problem | Stop and inspect |
Record the sheet position for every defect so a guide or pressure problem is not blamed on artwork.
Match the Finishing Method to Volume, Material, and Operator Effort
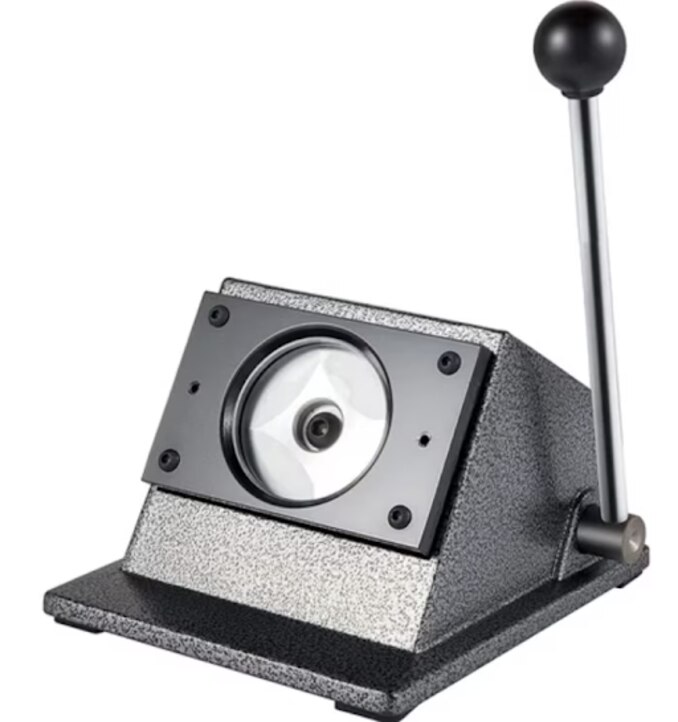
A manual ID card punch suits occasional office work and short school, club, visitor, or membership-card runs when the sheet layout is fixed and an operator can feed and inspect every sheet. Estimate finished output as cards per stroke multiplied by strokes per hour, then subtract time for loading, waste removal, inspection, and breaks.
| Option | Strength | Better choice when |
|---|---|---|
| Manual ID card punch | Low setup and direct operator control | Runs are short and layouts stay fixed |
| Guillotine cutter | Fast straight trimming | You need square cuts; it cannot create controlled CR80 rounded corners in one operation |
| Rotary trimmer | Flexible sheet handling | You accept separate corner rounding and lower multi-up repeatability |
| Electric die cutter | Lower hand effort and repeatable production | Runs repeat, with guarding, service access, and confirmed electrical supply |
| Multi-up die | Several cards per stroke | Registration, waste removal, and die maintenance are controlled |
Do not treat an advertised stroke rate as finished-card capacity. Request a timed demonstration using your complete laminated stock, and record hand force, cards per stroke, cycle time, and output after a sustained run.
High force, repeated full strokes, and awkward waste removal cause fatigue; fatigue produces incomplete punches and skewed registration. Outsourcing may cost less for irregular or high-volume work when setup, die replacement, labour, and quality checks exceed the value of owning equipment.
Choose another process for variable shapes, heavy laminated stock beyond the machine rating, automated production, or registration tighter than a manual guide can deliver.
Inspect Samples for Size, Corners, Edges, and Position-Dependent Defects
A usable card must survive measurement, handling, and insertion—not merely separate from the sheet. Before purchase, run the buyer’s artwork on the complete laminated construction, including the actual PVC, coating, adhesive, overlay, and holographic material. Let hot-laminated sheets cool and flatten for the agreed interval before cutting.
Use this sample inspection checklist:
- Take cards from the sheet centre and each corner with digital calipers.
- Record width, height, thickness, corner radius, and variation between samples.
- Compare each result with the 85.60 × 53.98 mm ISO/IEC 7810 ID-1 target and the agreed card cutting tolerance.
- Check all four corners for the same corner radius. Place each card against a known right-angle reference to reveal skew.
- Examine every edge under strong light for edge burrs, raised edges, whitening, cracks, delamination, adhesive pull, and incomplete cuts.
- Insert cards into the intended holder or printer; catching exposes a defect that dimensions alone can miss.
| Position | What to inspect | Failure revealed |
|---|---|---|
| Centre | Dimensions and edge finish | Baseline die performance |
| Each corner | Size, squareness, and radius | Guide or pressure error |
| Logo, photograph, signature panel, text, barcode, border | Distance from finished edge | Artwork-registration error |
Run enough sheets to expose die drift, heat-related curl, operator fatigue, and waste-frame removal problems. One clean first sheet proves little.
Separately test barcode readability, chip placement, magnetic-stripe performance, lamination bond strength, and electrical conformity. Cutting confirms shape and edge quality, not those functional properties.
Specify the Machine, Service, and Demonstration Conditions Before Buying
A written purchase specification prevents installation surprises. Request these included parts:
- Cutting die
- Handle
- Locating guide or stops
- Waste tray
- Tools
- Operating instructions
- Installation guidance
Ask whether replacement dies are stocked, whether sharpening is permitted, how die alignment is adjusted, which lubricant is approved, and the lead time and price for wear parts. Also ask how abrasive coatings, adhesive, dust, or excessive stack height affect die life and cutter maintenance.
Confirm the machine footprint in millimetres, shipping weight, operating weight, handle clearance, and the safe bench or floor position. For electrical equipment, specify 230 V at 50 Hz, protective earthing, ventilation, service access, and any compressed-air requirement.
| Machine type | Installation checks | Main service concern |
|---|---|---|
| Manual punch | Stable support and lever clearance | Die wear, alignment, and operator fatigue |
| Electric cutter | 230 V, earthing, ventilation, and service access | Electrical servicing and replacement wear parts |
| Pneumatic cutter | Compressor capacity, air pressure, and drainage | Compressor maintenance and air-line faults |
Require a supplier demonstration using your artwork and complete laminated stock, not thin unprinted PVC. Run multiple sheets, measure cards from centre and edge positions, show the corner radius, and remove both the waste frame and internal chads. Sun Graphics can document the die specification, material rating, accessories, service route, and sample results in writing.
Keep those records with the purchase specification so every later replacement die is checked against the same criteria.
Related products
 | ID Card Cutter ₹1850 DPL PVC ID Card Cutter Machine Specification Details Product Name PVC ID Card Cutter Machine Brand DPL Punching Size 86 × 54 mm Usage/Application ID... View product → |
 | ID Card Cutter ₹2350 / CR80 Manual Punching Machine Specification Details Product Name ID Card Cutter / Manual Punching Machine Model No. View product → |
Frequently asked questions
What finished dimensions should an ID card cutter produce?
For a conventional CR80 or ISO/IEC 7810 ID-1 card, specify 85.60 × 53.98 mm, nominally 0.76 mm thick, with a 3.18 mm corner radius.
How do you prevent a printed sheet from shifting during cutting?
Use the cutter’s guides, stops, and clamping method to hold the sheet flat and aligned before punching each card.
Which ID card finishing method suits your operation?
Match manual, lever-operated, or powered cutting to your card volume, PVC material, available space, and the operator effort you can sustain.
What should you inspect in cutter samples?
Measure card size, check all four corners and edge smoothness, and inspect cards from different sheet positions for shifted or inconsistent cuts.
What should you confirm before buying an ID card cutter?
Request a demonstration using your printed sheets and PVC, then confirm service support, replacement parts, alignment controls, and stated operating conditions.