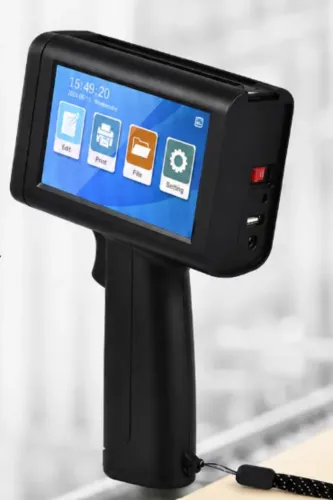
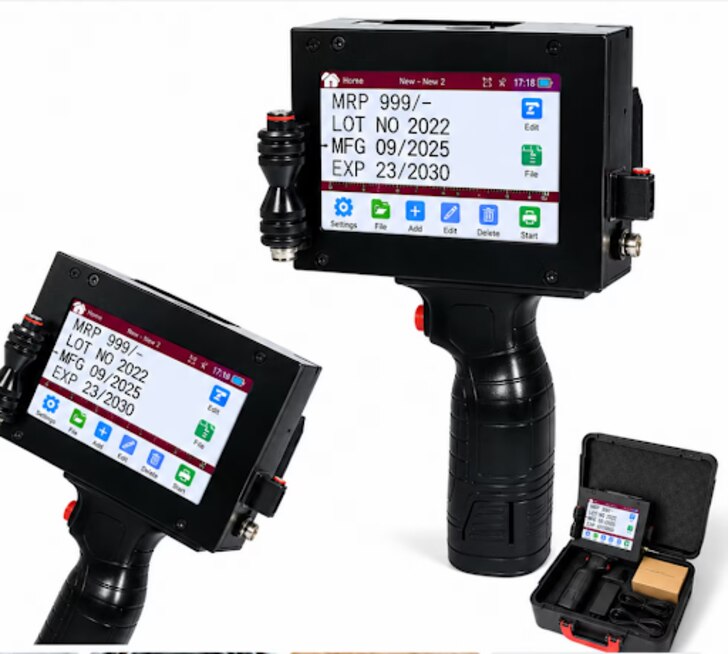
A handheld inkjet printer can mark a carton, label, pouch or film package only when the ink, surface preparation, hand movement and message settings match the production task. By the end, you will know how to prepare and print the pack, choose a workable ink and test whether the finished code survives handling and scanning.
Key takeaways
- Test on the actual carton, label or package before production.
- Match ink chemistry to both the packaging surface and its coating.
- Keep printing distance, movement and placement consistent on every pack.
- Verify dates, barcodes and QR codes for readability and traceability.
Set Up the Package, Cartridge and First Test Print
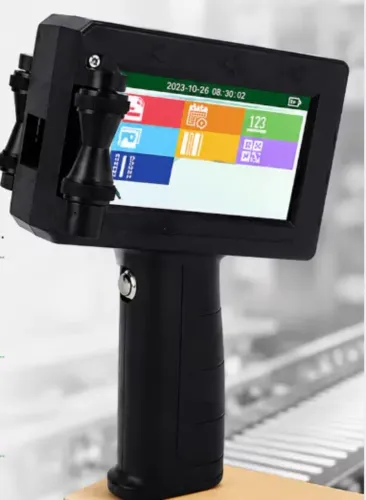
Begin with the actual carton, label or package stock, then prepare the printer, load the cartridge, enter the message and make a controlled test print before production. This handheld inkjet printer workflow prevents a clean bench-top result from hiding failures on dusty, coated, curved or chilled packaging.
1. Inspect the surface. Remove dust, loose fibres, oil and moisture; flatten a label or carton panel and avoid folds, seams and damaged corrugation. Packaging surface preparation determines whether ink wets and holds.
2. Confirm the ink matches the surface. Use fast-absorbing aqueous ink for suitable uncoated board; choose ink formulated for non-porous surfaces for coated cartons, glossy labels, films, laminates, glass or metal. Check the supplier’s compatibility data for the exact stock.
3. Remove the cartridge cap or seal only when ready to print. Complete the ink cartridge loading procedure, seat the cartridge firmly, run the specified nozzle check and replace the cap during pauses. An exposed printhead collects dust and solvent can evaporate, causing missing dots.
4. Enter the message and verify every character, date, lot number and code against the production record. Set the required print height and resolution, but do not assume the highest DPI will produce a readable code on absorbent board.
5. Print on a spare piece of the same package, keeping the printer at the intended distance and direction. Check darkness, alignment, smearing and edge definition.
Handle the test after the shortest real drying interval. Stack it, tape it, convey it or expose it to condensation as production requires; for cold-chain carton printing, test after refrigeration and condensation, not just immediately after printing.
Match Ink Chemistry to the Complete Packaging Surface
The right ink follows the complete packaging surface and its exposure, not the word “paper,” “plastic” or “metal.” Uncoated corrugated board absorbs fast-drying water-based ink well; dust, wax and rough flutes still weaken the mark.
| Ink type | Suitable surfaces | Main trade-off |
|---|---|---|
| Water-based ink | Uncoated cartons, corrugated boxes and absorbent paper labels | Low odour and simple handling, but poor rub or moisture resistance on a coated carton, glossy label stock, film, glass or metal |
| Solvent-based ink | Plastic film, laminated packs, synthetic labels, glass and metal | Better adhesion and quick drying on non-porous surfaces, but requires ventilation, flammable-liquid controls, safe storage and operator protection |
| Other specialist quick-dry inks | Difficult films, high-gloss laminates or applications needing extra chemical or abrasion resistance | Confirm cartridge compatibility, curing or drying conditions, and the required safety controls with the supplier |
Treat a label as a laminate, not a sheet of paper. Test the face stock, adhesive, liner release, overlamination and finished-pack abrasion or moisture exposure together.
Print a sample on the actual stock, then test rubbing, condensation and storage. For chilled products, test after refrigeration and the resulting condensation; a mark that looks dry at room temperature can lose adhesion on a cold pack.
Ask for the recommended printhead stand-off range for each ink and substrate: too much distance causes misplaced dots and overspray, while contact can contaminate the nozzle plate.
Control Distance, Movement and Placement on Real Packs
A steady pass matters more than nominal DPI. Keep the printhead-to-surface distance within the ink maker’s recommended stand-off range; too much gap spreads dots, while contact can dirty the nozzle plate. Hold the printer square to the face, because a changing handheld printer angle stretches one side of each character and shifts barcode bars.
- On a flat panel, brace your wrist or use the printer’s roller, guide, or alignment edge. Start before the print zone and continue past it without pausing.
- At carton edges and seams, slow down before the obstruction, keep the head parallel to the panel, and avoid letting the housing tip over the edge. Make a separate pass on the adjoining face.
- Across a fold, do not force the head into the crease. Print on one flat panel, or use a stencil that positions the message clear of the fold.
- Around corners and curves, maintain the same stand-off by rotating the pack rather than swinging the printer. A tight curve can distort bars even when text looks acceptable.
- In a recessed area, use a narrow guide or fixture if the printer cannot sit squarely. Do not compensate by increasing the gap.
Set print speed before production and keep it constant; a fast pass makes light, stretched marks, while a slow pass can darken or smear them. For barcodes, specify a positioning guide or template, then scan test marks at the intended distance and lighting. Surface dust and loose fibers also deserve removal before the pass.
Make Dates, Barcodes and QR Codes Readable and Traceable
Treat variable data printing as a controlled job, not a keyboard exercise. Create fields for the production date, expiry date, batch number and sequential serial number, then link them to an approved production record. Define the date format and code content before printing; one mistyped month can make an entire run untraceable.
- Select the approved job by its name or job ID before loading the first pack.
- Confirm the active message on the printer screen against the work order, including the batch or lot code.
- Prevent duplicate serials and stale messages by locking completed jobs and advancing numbers automatically.
- Record the starting and ending serial numbers, operator, time and quantity printed.
- Quarantine misprinted or rejected packs, and require a controlled reprint so discarded serials cannot re-enter production.
Check the first and last pack from each job, plus a reprint, for text accuracy and code readability. Scan each 1D barcode or QR code at the intended distance and lighting; use a verifier when module width or print contrast matters. Inspect placement, edge clipping, smearing and distortion after handling.
A guide or fixture helps maintain location and hand movement, because an attractive code can still fail when speed, angle or height changes.
Choose a Handheld Setup That Fits Your Production Risk
Choose portable printing for short runs, rework, oversized cartons, or packs that cannot reach a fixed print station. Choose fixed equipment when code position, triggering and repeatability matter more than mobility.
| Option | Strength | Main risk | Best fit |
|---|---|---|---|
| Portable printer | Fast setup and access to awkward packs | Hand speed, angle and placement vary | Short runs, rework and changeovers |
| Fixed printer | Automatic triggering and repeatable position | Installation and format changes take time | High-volume lines and contract-critical placement |
| Hybrid setup | Portable backup with fixed production control | Requires two validated workflows | Seasonal demand, line interruptions and reprints |
Reduce failures with controls that remove operator guesswork:
- Use a stencil, mechanical guide, fixture or marked print zone when placement affects packing, scanning or customer acceptance.
- Clean carton dust, loose fibres, handling oil and wax from the print face; carton dust and condensation require separate checks because moisture can stop ink wetting.
- Test the worst-case carton, label or film after refrigeration, condensation, abrasion and storage—not only immediately after printing.
- Lock job selection and require confirmation of the active lot, expiry or serial range. Prevent duplicate, stale and rejected-pack messages.
- Specify a positioning guide or controlled scanning motion, then check linear codes to ISO/IEC 15416 and two-dimensional symbols to ISO/IEC 15415 with a barcode verifier.
Ask Sun Graphics whether the proposed portable coding equipment supports message permissions, reprint control, guide accessories, ink compatibility and documented sample testing. A fixed printer comparison should include changeover time, cleaning, reject handling and the cost of a misplaced code—not only purchase price.
Related products
 | Handheld Inkjet Printer G-11 BODY Handheld Inkjet Printer ₹8000 High Performance Coding Solution The **G-11 BODY Handheld Inkjet Printer** is a powerful and reliable coding solution designed for modern industries... View product → |
 | Handheld Inkjet Printer G-05 MINI Handheld Inkjet Printer ₹5100 High Resolution Printing Solution The **G-05 MINI Handheld Inkjet Printer** is a compact and portable coding and marking solution designed for fast,... View product → |
Frequently asked questions
How do you set up a handheld inkjet printer for packaging?
Prepare the actual carton, label or package stock, load the cartridge, enter the message and make a controlled test print before production.
How do you choose ink for cartons, labels and packaging?
Match the ink chemistry to the complete packaging surface, including coatings, films, dust and chilled or curved areas.
How do you keep handheld prints consistent on real packages?
Control the printer’s distance, movement and placement while printing on the actual production pack rather than relying only on a bench-top test.
How do you make printed dates, barcodes and QR codes readable?
Use controlled placement and movement, then inspect test prints for clear characters and machine-readable codes before production.
Related products
 | Handheld Inkjet Printer G-35 SMART TIJ Handheld Coding Printer G-35 SMART TIJ Handheld Coding Printer The G-35 SMART is a compact and intelligent Thermal Inkjet (TIJ) printing solution designed for easy,... View product → |
 | Handheld Inkjet Printer G-28 MASTER Handheld Inkjet Printer ₹5600 Advanced Coding & Marking Solution The G-28 MASTER Handheld Inkjet Printer is a powerful and portable printing solution designed for high-quality... View product → |
 | G-55 Handheld Inkjet Printer ₹5000 G-55 Handheld Inkjet Printer The G-55 Handheld Inkjet Printer is a compact and portable coding solution designed for printing text, dates, batch... View product → |
 | Handheld Inkjet Printer G-10 PRO TIJ Industrial Coding Printer G-10 PRO TIJ Industrial Coding Printer The G-10 PRO is a next-generation Thermal Inkjet (TIJ) coding and marking solution designed for high-speed... View product → |